Week Four
Click the Arrow to Proceed to Project Page
Click the Arrow to Proceed to Project Page
Nap Pod Prototyping Round 1
The process: This week I decided to focus on what I want the physical form of the nap pod to look like. 3D printing seemed to provide a great opportunity for this as there are few limitations on what kinds of shapes you can use in 3D printing as long as you keep layer thickness and support material in mind. I also knew that I wanted my piece to move, just as the doors of the actual nap pod would ideally move.

Method:
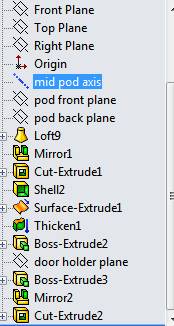
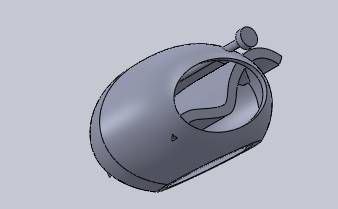
I used SolidWorks to model my design. I had sketched out some initial ideas for Week 1, so I had some forms to start with. For prototype 1, the pod would look a bit like an open-sided egg, with doors that could be adjusted by the user to change the degree of enclosure.
I started with the oval shell, creating wholes in both sides to allow entrance. To create the oval, I used a combination of lofting and revolving to test out shapes. It took me a while to determine the correct combination and order of features, but I eventually settled on something that worked.
For the interior sleeping structure, I tried to model a form that would be supportive, but accomodating to various sleeping positions. I created a new surface so that I could create an abstract form, and I then thickened ths surface to give it some structure. I encountered numerous issues with this process, and I certainly have a lot of exploration in SolidWorks left to do. I needed to ensure that my surface would print as a connected piece with the outer oval, so to do this I designed the surface to extend past the shell. Unfortunately, I was then unable to crop off the bits of the surface that I did not want to print. There is supposedly a trim tool that would assist in this process, but I was unable to get it to work. So for now, the nap pod looks a bit like a nap rocket.

To create the moving parts, I added two rod-like structures to the main pod. I designed two "cover" pieces with holes to sit on these rods and swing up and down. One of the main constraints with 3D printing is layer thickness- to ensure discrete parts, spacing should be the equivalent of about two layers, or .015". I took this into account when creating the holes to ensure that there would be enough room for the doors to slide. Unfortunately, I was slightly off with my measurement of rod length, so there were some issues with the motion (which I shall describe below).
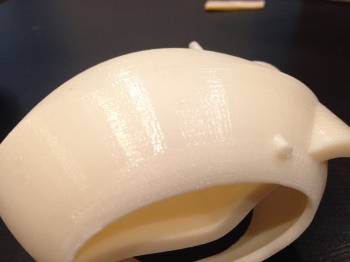
Once my three pieces had printed, I faced an interesting challenge. I had place caps on the ends of the rods to ensure that the doors would not fall off once attached, but this also meant that I could not just slide the doors on. Instead, I went on a mission to find out what tools could effectively cut through the plastic. I ended up using a hacksaw to cut through the rods. As shown in the picture above, on one end I cut the rod right against the rod, and on the other end I cut the rod closer to the pod itself. I was curious to see if this would make any difference to the motion, and I soon found out that it did.
Once the rods had been cut, it was time to use a hot glue gun to reassemble the pieces.


The Result
As mentioned earlier, I cut the rods in different places. This did in face end up mattering. On the side with the rod cut at the cap, the glue essentially had to stick to the door as well as the rod to ensure adequate contact. Thus, the door was unable to move. On the other side, the rod connected closer to the pod itself, thus allowing the door to move. The glue actually served the benefit of elongating the rod slightly, rectifying my slight error in measurement earlier in the process. The door on this side slides up and down easily.

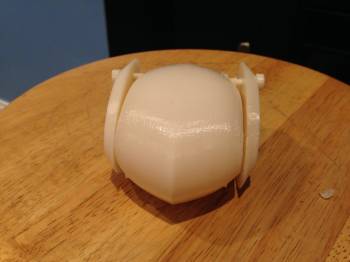
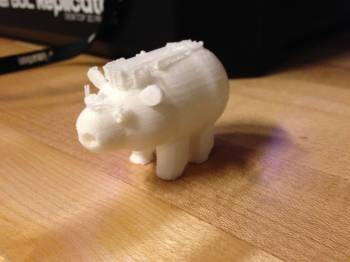
Overall, the nap pod was a relative success. However, I wanted to play around with some other shapes, so I decided to try to make another piece. A classmate and I had derived some serious entertainment from this little hippo: 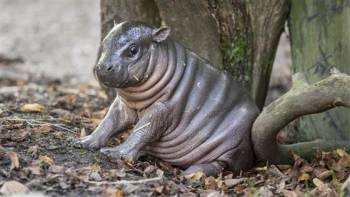 , so I decided to go ahead and print him a hippo. As it turns out, SolidWorks is not an excellent tool for creating round, organic-looking animals. In future I might try to use Rhino. I ended up creating dozens of planes and struggling to figure out how to draw all of the features that I wanted. Ultimately, I created more of a "pigpo" rather than a hippo, but I was realtively pleased with the results.
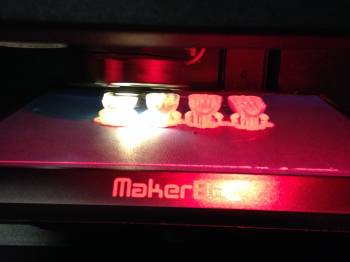
 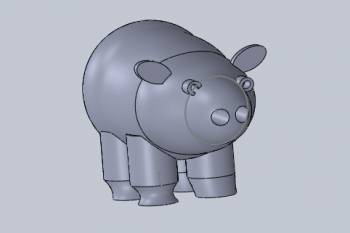 The issues are most visible in the face, but I printed this on the MakerBot to compare the processes anyway.
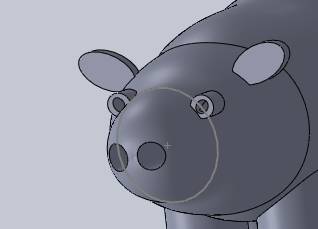
3D Scanning
I found this process to be extremely frustrating. I used the "Sense" device in the shop to attempt to scan various objects of various sizes and textures. I started with a shiny buddha statue from my desk. The piece is about 2 inches tall and the coating is shiny. This created all sorts of problems in terms of the way the light interacts with the surface, so I did not get a good scan from this item. I tried scanning a duck that was sitting in the shop (probably around 5 inches in size), and continuously lost tracking. In discussing the issues with others, I discovered that larger objects are probably much more effective for the process, and that the optimal scanning distance is probably about a foot or two away. I did not have a lot of success with this process and generally found it to be unpleasant.